그동안 픽셀폰 쓰느라 s9 은 쳐다도 안봤습니다.
뒷방 늙은이 신세였던 s9 단말기에 PixelExperience + kernelSU 를 올려봤더니...좋네요.
앱 모의해킹하시는 분들 kernelSU 적극 추천 드립니다.
- 사전 준비 사항
Windows10, Ubuntu 22.04.3 VM 에서 진행
갤럭시 s9 (SM-G960N) AOS10 순정에 twrp 올려놓기
PixelExperience 13 커스텀롬 준비 (https://get.pixelexperience.org/starlte)
- Build Kernel
출처: https://github.com/CruelKernel/samsung-exynos9820
# Install prerequisites
# If you use ubuntu or ubuntu based distro then you need to install these tools:
sudo apt-get install build-essential libncurses-dev libtinfo5 bc bison flex libssl-dev libelf-dev heimdall-flash android-tools-adb android-tools-fastboot curl p7zip-full

# Install avbtool
wget -q https://android.googlesource.com/platform/external/avb/+archive/refs/heads/master.tar.gz -O - | tar xzf - avbtool.py
chmod +x avbtool.py
sudo mv avbtool.py /usr/local/bin/avbtool

# Install mkbootimg
wget -q https://android.googlesource.com/platform/system/tools/mkbootimg/+archive/refs/heads/master.tar.gz -O - | tar xzf - mkbootimg.py gki
chmod +x mkbootimg.py
sudo mv mkbootimg.py /usr/local/bin/mkbootimg
sudo mv gki $(python -c 'import site; print(site.getsitepackages()[0])')

# Install mkdtboimg
wget -q https://android.googlesource.com/platform/system/libufdt/+archive/refs/heads/master.tar.gz -O - | tar --strip-components 2 -xzf - utils/src/mkdtboimg.py
chmod +x mkdtboimg.py
sudo mv mkdtboimg.py /usr/local/bin/mkdtboimg

# Get the sources
git clone https://github.com/PixelExperience-Devices/kernel_samsung_exynos9810.git
cd kernel_samsung_exynos9810
git clone --depth=1 https://github.com/kdrag0n/proton-clang.git
kernelSU를 받고,
curl -LSs "https://raw.githubusercontent.com/tiann/KernelSU/main/kernel/setup.sh" | bash -
커널 소스 코드를 수동으로 패치 (출처: https://kernelsu.org/guide/how-to-integrate-for-non-gki.html)
(1) fs/exec.c 파일 패치
다음 코드 추가
extern int ksu_handle_execveat(int *fd, struct filename **filename_ptr, void *argv, void *envp, int *flags);
ksu_handle_execveat(&fd, &filename, &argv, &envp, &flags);

(2) fs/open.c 파일 패치
다음 코드 추가
extern int ksu_handle_faccessat(int *dfd, const char __user **filename_user, int *mode, int *flags);
ksu_handle_faccessat(&dfd, &filename, &mode, NULL);

(3) fs/read_write.c 파일 패치
다음 코드 추가
extern int ksu_handle_vfs_read(struct file **file_ptr, char __user **buf_ptr, size_t *count_ptr, loff_t **pos);
ksu_handle_vfs_read(&file, &buf, &count, &pos);

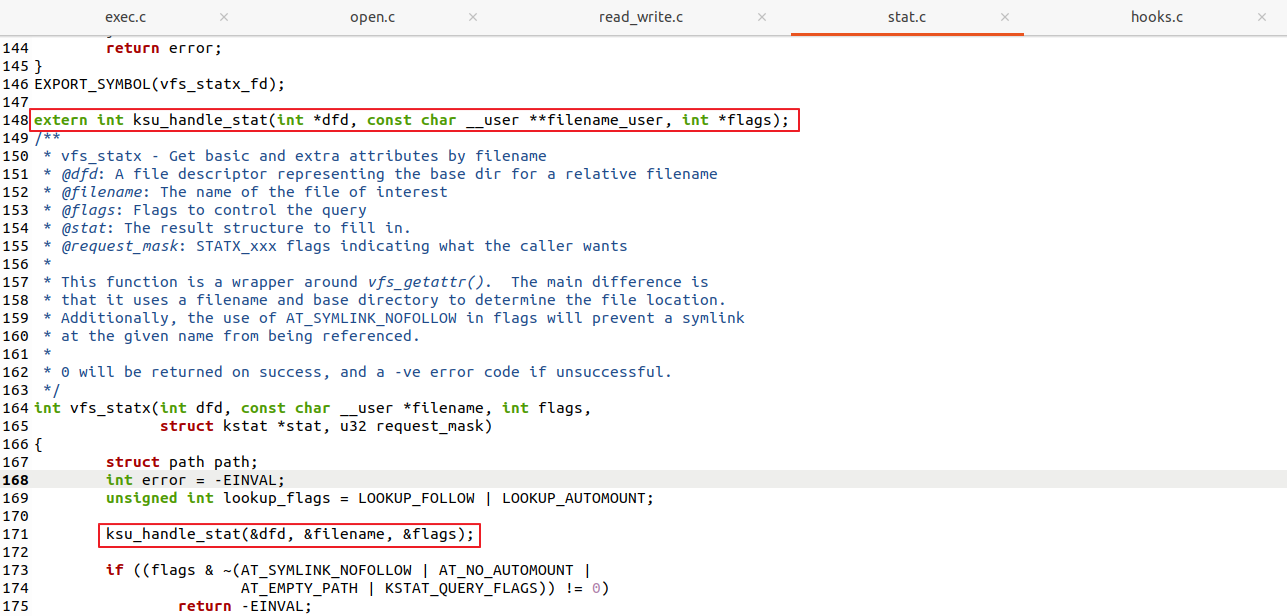
(4) fs/stat.c 파일 패치
다음 코드 추가
extern int ksu_handle_stat(int *dfd, const char __user **filename_user, int *flags);
ksu_handle_stat(&dfd, &filename, &flags);

(5) drivers/input/input.c 파일 패치
다음 코드 추가
extern bool ksu_input_hook __read_mostly;
extern int ksu_handle_input_handle_event(unsigned int *type, unsigned int *code, int *value);
if (unlikely(ksu_input_hook))
ksu_handle_input_handle_event(&type, &code, &value);

(6) security/selinux/hooks.c 파일 패치
패치 안하면 커널수 모듈 작동 안함
다음과 같이 패치 (출처: https://github.com/F-19-F/android_kernel_oneplus_msm8998/commit/1042d5601a1c0db08c9a9cea89d1895e74576a27)
static inline u32 current_sid(void) --> u32 current_sid(void)

check_nnp_nosuid 함수를 다음과 같이 패치
...

static int check_nnp_nosuid(const struct linux_binprm *bprm,
			    const struct task_security_struct *old_tsec,
			    const struct task_security_struct *new_tsec)
{
	static u32 ksu_sid;
	char *secdata;
	int nnp = (bprm->unsafe & LSM_UNSAFE_NO_NEW_PRIVS);
	int nosuid = !mnt_may_suid(bprm->file->f_path.mnt);
	int rc, error;
	u32 seclen;

	if (!nnp && !nosuid)
		return 0; /* neither NNP nor nosuid */

	if (new_tsec->sid == old_tsec->sid)
		return 0; /* No change in credentials */

	if(!ksu_sid){
		security_secctx_to_secid("u:r:su:s0", strlen("u:r:su:s0"), &ksu_sid);
	}
	error = security_secid_to_secctx(old_tsec->sid, &secdata, &seclen);
	if (!error) {
		rc = strcmp("u:r:init:s0",secdata);
		security_release_secctx(secdata, seclen);
		if(rc == 0 && new_tsec->sid == ksu_sid){
			return 0;
		}
	}

 ...
다음 명령어 순서대로 입력해서 커널 빌드. 대략 20분정도 소요됨.
export PATH=~/kernel_samsung_exynos9810/proton-clang/bin:${PATH}
make O=out ARCH=arm64 CC=clang exynos9810-starlte_defconfig
make O=out ARCH=arm64 CC=clang CROSS_COMPILE=aarch64-linux-gnu- CROSS_COMPILE_ARM32=arm-linux-gnueabi- AR=llvm-ar NM=llvm-nm OBJCOPY=llvm-objcopy OBJDUMP=llvm-objdump STRIP=llvm-strip -j12

빌드가 완료되면 out/arch/arm64/boot 디렉터리에 Image 파일이 떨어짐

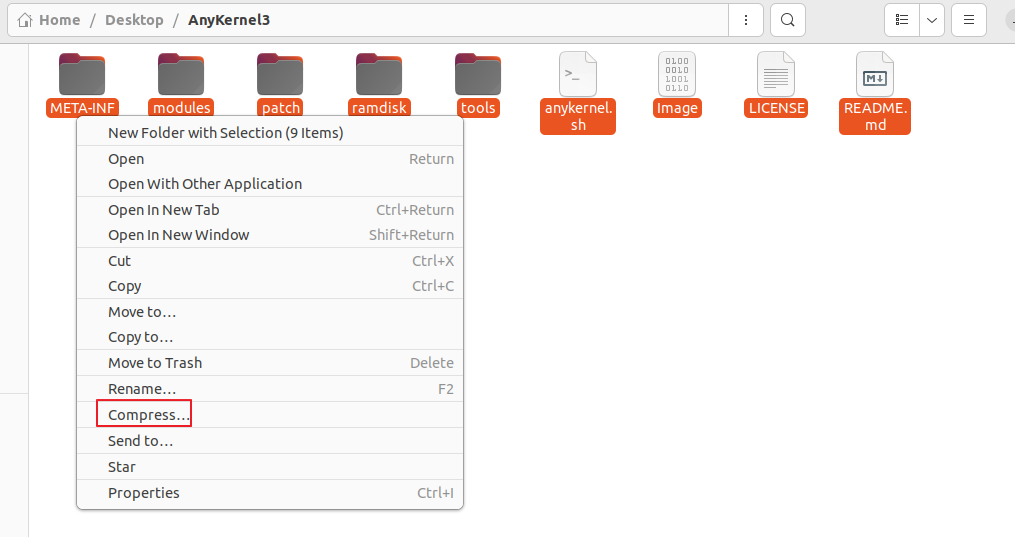
AnyKernel3(https://github.com/osm0sis/AnyKernel3) 디렉터리에 Image 파일 옮기고 압축

※ anykernel.sh
### AnyKernel3 Ramdisk Mod Script
## osm0sis @ xda-developers

### AnyKernel setup
# global properties
properties() { '
kernel.string=ExampleKernel by osm0sis @ xda-developers
do.devicecheck=0
do.modules=0
do.systemless=1
do.cleanup=1
do.cleanuponabort=0
device.name1=
supported.versions=
supported.patchlevels=
supported.vendorpatchlevels=
'; } # end properties


### AnyKernel install
## boot files attributes
boot_attributes() {
set_perm_recursive 0 0 755 644 $ramdisk/*;
set_perm_recursive 0 0 750 750 $ramdisk/init* $ramdisk/sbin;
} # end attributes

# boot shell variables
block=/dev/block/platform/11120000.ufs/by-name/BOOT;
is_slot_device=0;
ramdisk_compression=auto;
patch_vbmeta_flag=auto;

# import functions/variables and setup patching - see for reference (DO NOT REMOVE)
. tools/ak3-core.sh;

# boot install
dump_boot; # use split_boot to skip ramdisk unpack, e.g. for devices with init_boot ramdisk

write_boot; # use flash_boot to skip ramdisk repack, e.g. for devices with init_boot ramdisk
## end boot install
- Kernel 플래싱
twrp 리커버리 --> wipe --> format data --> yes --> advanced wipe --> Dalvik / System / Data / Cache 체크 & wipe --> PixelExperience, anykernel.zip 플래싱 --> reboot
부팅 완료 후 https://github.com/tiann/KernelSU/releases 에서 최신버전 KernelSU.apk 다운로드 받아서 adb install 로 설치

'Information Security > Android' 카테고리의 다른 글
| Attach Frida Using Frida-gadget Zygisk Module (0) | 2023.11.27 |
|---|---|
| Galaxy S10 PixelExperience 12 + KernelSU (1) | 2023.10.28 |
| Move User Certs KernelSU Module (0) | 2023.10.21 |
| Galaxy S10 LineageOS 12 + KernelSU (6) | 2023.10.03 |
| Frida Unreal Engine Dumper (8) | 2023.08.20 |
